First choose your image - here is mine
 |
| Lola, aged 2 |
Now, duplicate your back ground image - press CTRL + J
Press Shift+Ctrl+U to desaturate the layer
Now your picture will be black and white - pretty eh?
Now press CTRL + J again to duplicate the desaturated layer
you should now have 3 layers...Press Ctrl+I to invert the layer
Press Shift+Alt+D to change the blend mode to Colour Dodge
your picture will look like it's gone, but don't fret -
Go to Filter > Other > Minimum. Leave the Radius value set to 1 pixel and click OK to close out of the filter's dialog box
 |
Press Shift+Alt+Ctrl+E
this merges the layers onto a new layer above the others
Press Shift+Alt+M to change the blend mode of the merged layer to Multiply, which darkens the sketch effect.
Lower the layer Opacity value if the sketch now appears too dark.
 |
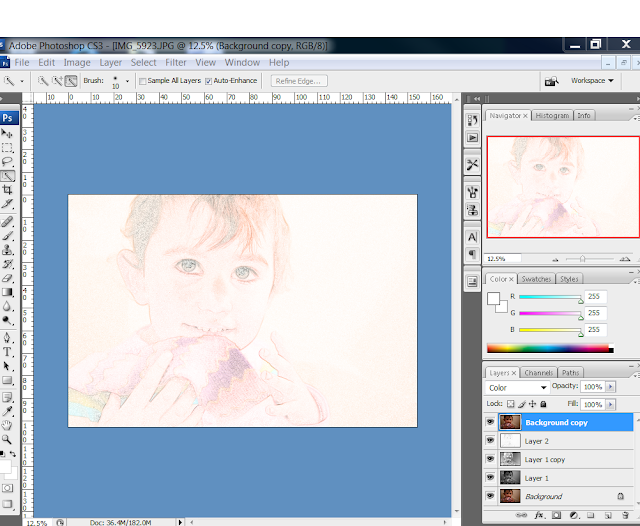
| see where highlighted |
Click on the Background layer in the Layers panel to select it, then press Ctrl+J to duplicate it.
Press Shift+Ctrl+] to jump the Background copy layer to the top of the layer stack.
Press Shift+Alt+C to change the blend mode to Colour to colour the sketch
Lower the Opacity value to reduce the intensity of the color if needed.
 |
| finished |
there... all done
 |
| done |


Oh, that is pretty. Thanks for the tip, will have to try it out.
ReplyDeleteIt's good to play around with until you create the right effect :)
ReplyDeletemy first child is due in October and I'm bookmarking your tutorials now - great tips
ReplyDeleteWhat a great tutorial, and a lovely blog!
ReplyDeleteI'm fairly computer literate but photo-shop continues to confuse me, I just can't seem to get it, and tutorials like yours look very helpful, keep up the good work!
thank you Jess!
ReplyDelete